|  |  |
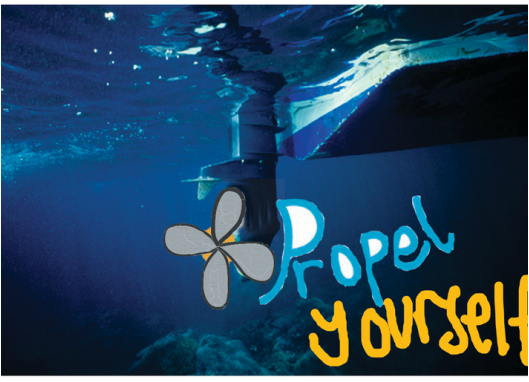
For my logo I decided to design a propeller for the fictional company Propel. I made the propeller logos using illustrator. First, I started off by painting a random shape without the idea of creating a propeller in mind and from there, my idea expanded into being a propeller. I believe that the design of a propeller is quite sleek and I love the lines that come together to make one up. The design on the far left was my original design that I painted and from there I made the other two propellers. I decided to give my next propeller an underwater look to it so therefore, I changed the color of the circle to match the color of seaweed as well as I added an underwater texture to each of the propeller blades to make it appear as though it has been on a boat for a long time. In my third design (the design I ended up going with) I also played around with the texture tool and changed the texture of each of the blades to a mosaic tile texture. In order to make my actual billboard, I used Photoshop. I began by placing my logo onto a picture of a boat. Then I added a catchy slogan onto the billboard in Photoshop and expanded it in order to fit the size of my billboard. One of the problems I had, was coming up with creative and different designs in order to make different options for my client. In the end, I had help from my neighbors and came up with these three different designs and chose the one on the far right to be the design on my billboard. Another problem I encountered was with the paint bucket tool. I could not get it to color in the enclosed space that I wanted colored. Therefore, I had to just go in with the paintbrush tool and paint that enclosed space in with dragging my mouse across the screen. A down side to using the paintbrush tool is that when I applied a texture to my propeller blades, you could see the individual paint strokes that I took; however, that just adds character :) I enjoyed this assignment and it definitely broadened my horizons in both Photoshop and Illustrator!
 |  |


 RSS Feed